Prior to taking the minutes, you should take attendance for both voting and non-voting members. Taking attendance enables the ability to record votes for voting members. After taking attendance, you have the option to choose how to display the attendees on the minutes. Follow the steps below on how to take attendance and how to customize your attendee list.
How to Record Attendance
- Navigate to the Meeting Agenda screen
- Click on the Meeting Management menu, upper right-side
- Click on Attendance (a new window will open)

- Click Import Attendees
- Check off the present box for each member in attendance
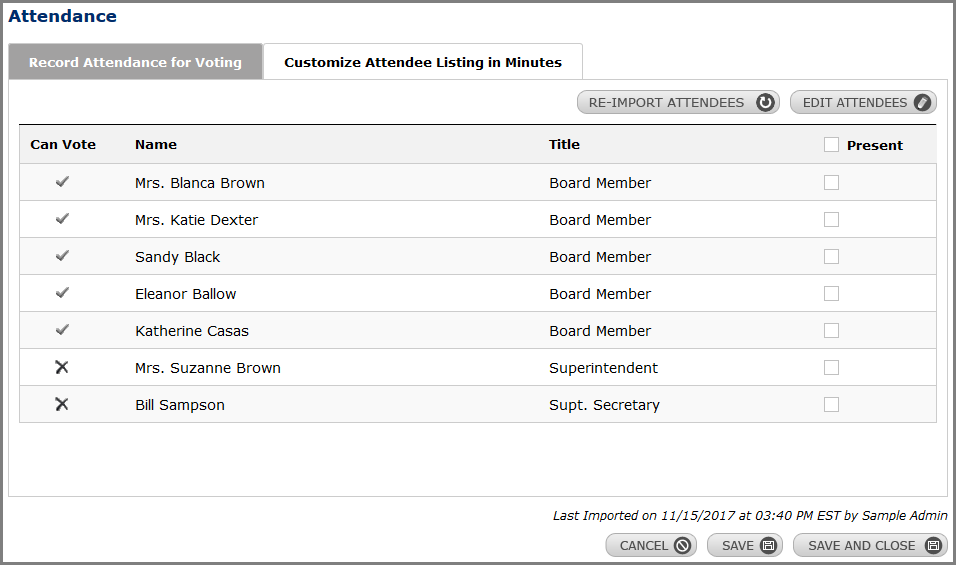
NOTE: If all members are present, the box in the header next to the word Present can be checked and will automatically select all as present. If attendees are missing or need to be edited, you can click on Edit Attendees and access the Minutes Administrator page where you can add and edit members. - Click Next
- Click Save and Close
Attendees Listing in Minutes
You have the option of either displaying Simbli’s default attendee listing on your minutes or editing/customizing them. This can only be done after recording attendance but can be modified at any point after attendance is recorded. To edit/customize your attendee list, follow the steps listed below:
How to Customize Attendee Listing
- Navigate to the Meeting Agenda screen
- Click on the Meeting Management menu, upper right-side
- Click on Attendance (a new window will open to record attendance)
- Click on the Customize Attendee Listing in Minutes tab
NOTE: Attendees must be imported and attendance taken in order to customize the attendees list - Select Customize, located above the list of attendees

- In the text editor you can choose to manually enter attendees or to import attendees for a list of voting and non-voting members
- Make necessary edits or changes
- Click Save and Close

Was this article helpful?
YesNo