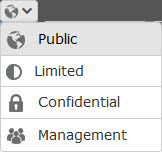
Visibility restrictions can be placed on agenda items or individual fields so that only the users with the proper permission can view it or its content. There are four different types of views that can be applied: Public, Limited, Confidential, or Management. Follow the steps below on how to set visibility restrictions on items and fields.
Visibility Types
| Visibility | Description |
|---|---|
| Public View | Agenda items or fields content will be display to all who access your Simbli site, including users without log-in access |
| Limited View* | Agenda item title will display to the public, content will not display to public or users who do not limited view permission |
| Confidential View | Agenda item and/or field’s content will be hidden from public and users who do not have confidential view permission |
| Management View | Agenda item and/or field’s content will be hidden from public and users who do not have management view permission |
*Limited View can only be applied to an agenda item. It cannot be applied to fields
NOTE: Applying a visibility restriction to an agenda item will override any restrictions placed on fields or supporting documents. The ability to apply restrictions to fields disappears if any option other than public view is chosen for an item.
How to Change Visibility on Agenda Item
- Navigate to meeting agenda
- Click on agenda item
- Click on edit icon
- In item visibility drop-down, choose the view for the item
- Click Save
How to Change Visibility on Fields
- Click on agenda item
- Next to field* title, select visibility
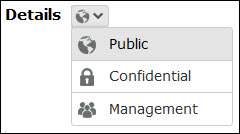
NOTE: For fields, only Public, Confidential, or Management view can be selected.
Selecting a visibility restriction on an item will disable the ability to select visibility on a field. - When finished, click Save
*Some fields visibility cannot be changed on an individual basis. Those fields are:
- Quick Summary/Abstract
- Recommendation
- Goals
- Policies
- Meeting Minutes
How to Change Visibility on Supporting Documents
- Navigate to agenda item
- Go to the Supporting Documents field
NOTE: If the Supporting Documents field needs to be added, follow the steps in this article. - Add supporting documents
NOTE: For more information on adding supporting documents, please follow the steps listed here. - Next to the supporting document, choose the document visibility
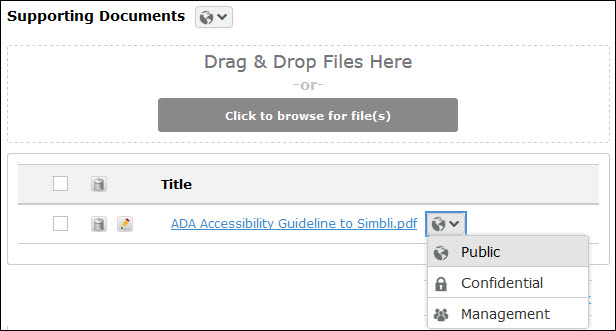
- When finished, click Save